 To launch labAlive simulation applications you need a Java Runtime Environment supporting Java Web Start on your system. Here you can get more information about installing the right Java version.
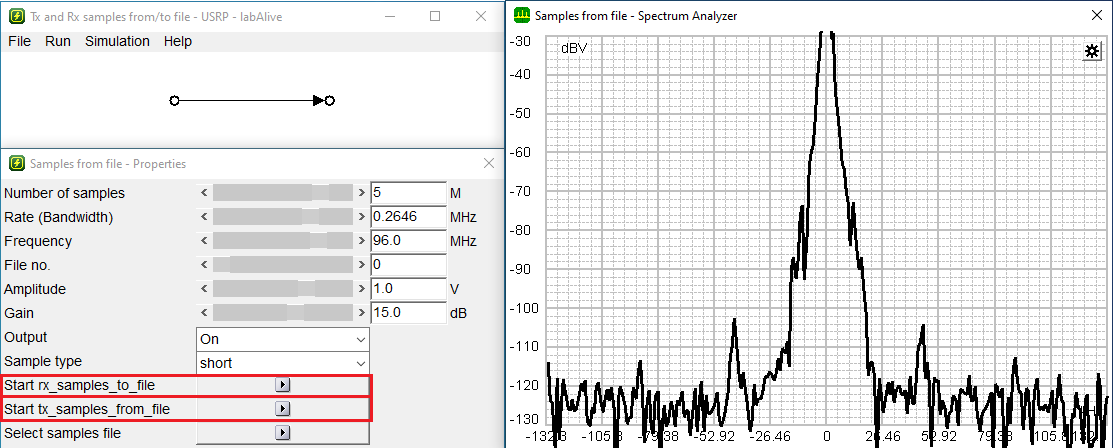
Transmit and receive samples from/to file with USRP
This experiment can be used to send a .shortc file filled with complex samples or to receive a signal with the USRP and save the samples to a .shortc file.
Transmit samples from file
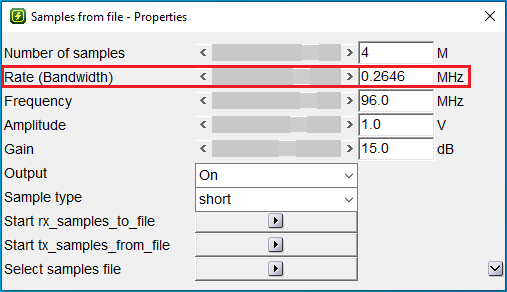
The first thing you have to do is to set the "Rate (Bandwidth)" in the properties-window, because the experiment will
restart to set the new rate properly.The restart will reset all other settings to default. This value is the sample rate for the ADC/DAC
in the USRP.
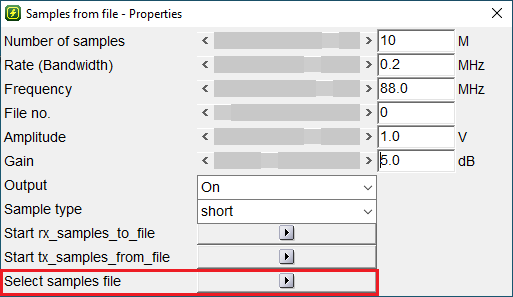
After that you have to select the .shortc file you want to send via USRP.
You can choose your file by clicking the "Select sample file" - button in the "Samples from File - Properties" - window.
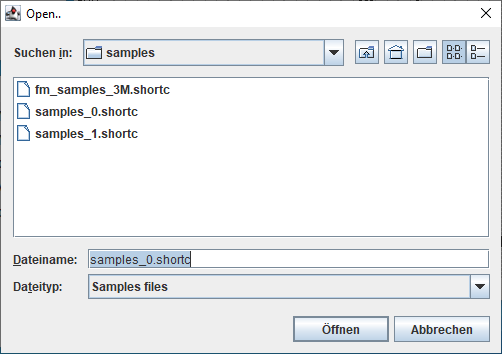
The file-selector will open. Go to the location where your sample file is saved an choose your file.
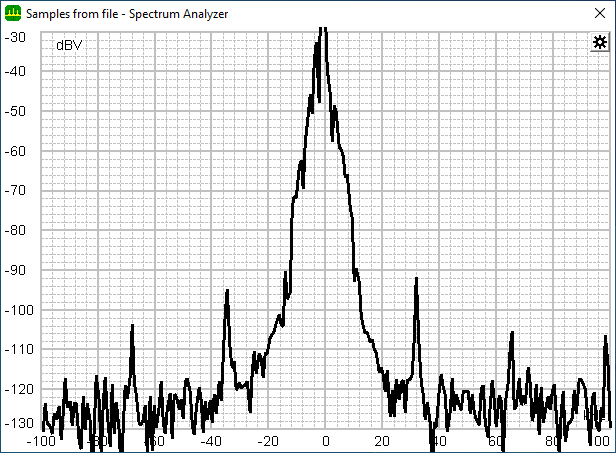
The "Samples from file - Spectrum Analyzer" moves and shows the spectrum of your signal from the
sample file if it is completely loaded.
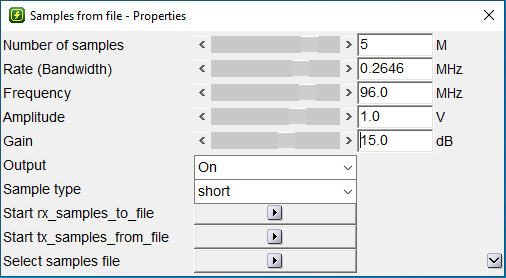
Now you have to configure some parameters in the "Samples from file - Properties" - window which the USRP needs to
send your file correctly.
- If you send a file you don't need to set the "Number of samples" because the file will be sent completely.
- The "Rate (Bandwidth)" should already be set.
- Choose the carrier frequency you want to use to send your signal. The USRP allows frequencies between 10 MHz and 6 GHz but the antennas can limit the usable frequency band. It is recommended to choose a transmission frequency between 20 MHz and 200 MHz.
- Choose the amplitude you want to use for the simulation of your signal. The amplitude of the transmission signal will always be 1.0 V
- Choose the gain you want to use to send your signal. The gain depends on the area and the distance between the transmitter and the receiver. The USRP allows a gain between 0 and 31.5 in 0.5 steps
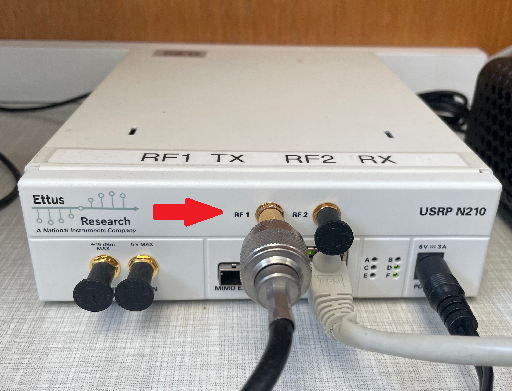
Make sure that the transmission antenna is connected to the RF 1 - connector at the USRP
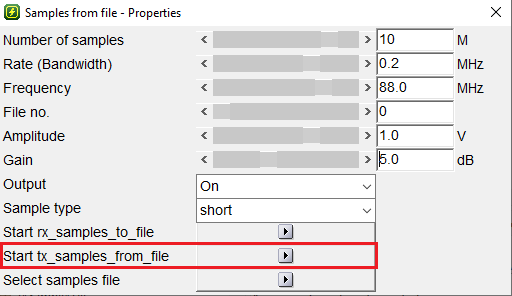
If all settings for transmission are set as required, the samples can be sent from file
by clicking the "Start tx_samples_from_file" - button in the "Samples from File-Properties" - window.
Receive samples with the USRP and save them to a file
To receive complex samples and save them to a file you need to generate a new .shortc file or choose an existing file to overwrite with the new received samples.
If you want to overwrite an existing file, use the file-selector to choose the file you want to overwrite.
If you want to generate a new file, you have to use the "Signal logging" - function.
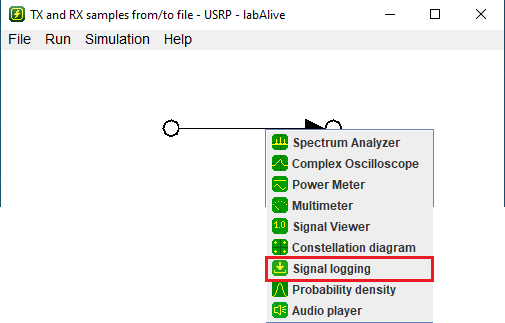
You can open the Signal-Logger by right clicking on the arrow in the main window and choose
"Signal logging"
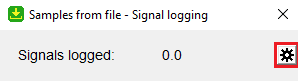
The "Samples from file - Signal logging" will open and you have to click on the little gear on the right to open the settings.
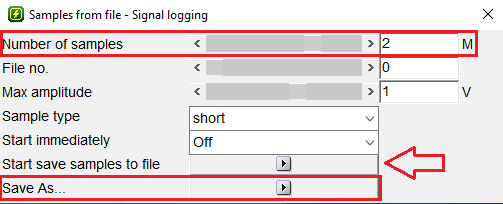
Now you have to choose how many samples you want to save into your file. The "Number of samples" determines the duration of the
reception process.
After that, click onto the "Save As..." - button and choose a location and a name for your samples file.
To generate the file, click onto the "Start save samples to file" - button.
- Now go back to the "Sample from file - Properties" - window and use the file-selector to choose the generated file for saving the received samples.
- The empty sample file will be loaded and the spectrum analyzer will show nothing because the file is empty.
Now you have to configure your receiver settings.
- Choose the settings for the receiver exactly as you set it for the transmitter.
- You can choose a larger number of samples to make sure you receive all the transmitted samples. The "Number of samples" determines the duration of the reception process.
- Make sure you use the same bandwidth and the same carrier frequency you have chosen for the transmitter.
- Choose the max. amplitude to amplify the received signal. Be aware that the background noise is also amplified. It is recommended to use 1.0 V first to test the receiver. If the amplitude of the received signal is to small choose a larger amplitude to amplify the received signal.
- Choose the gain you want to use to receive your signal. The gain depends on the area and the distance between the transmitter and the receiver. The USRP allows a gain between 0 and 31.5 in 0.5 steps.
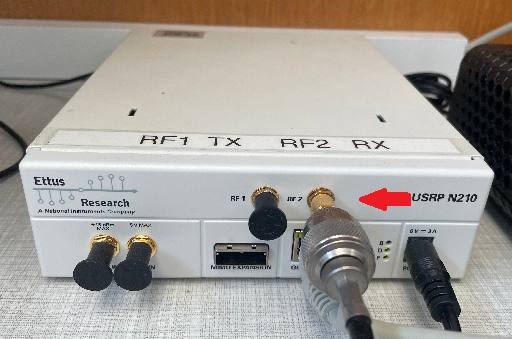
Make sure that the receive antenna is connected to the RF 2 - connector at the USRP
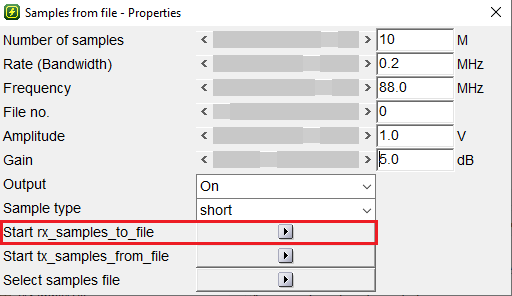
If all settings for the receiver are set as required, the samples can be received and saved into the file
by clicking the "Start rx_samples_to_file" - button in the "Samples from File - Properties" - window.